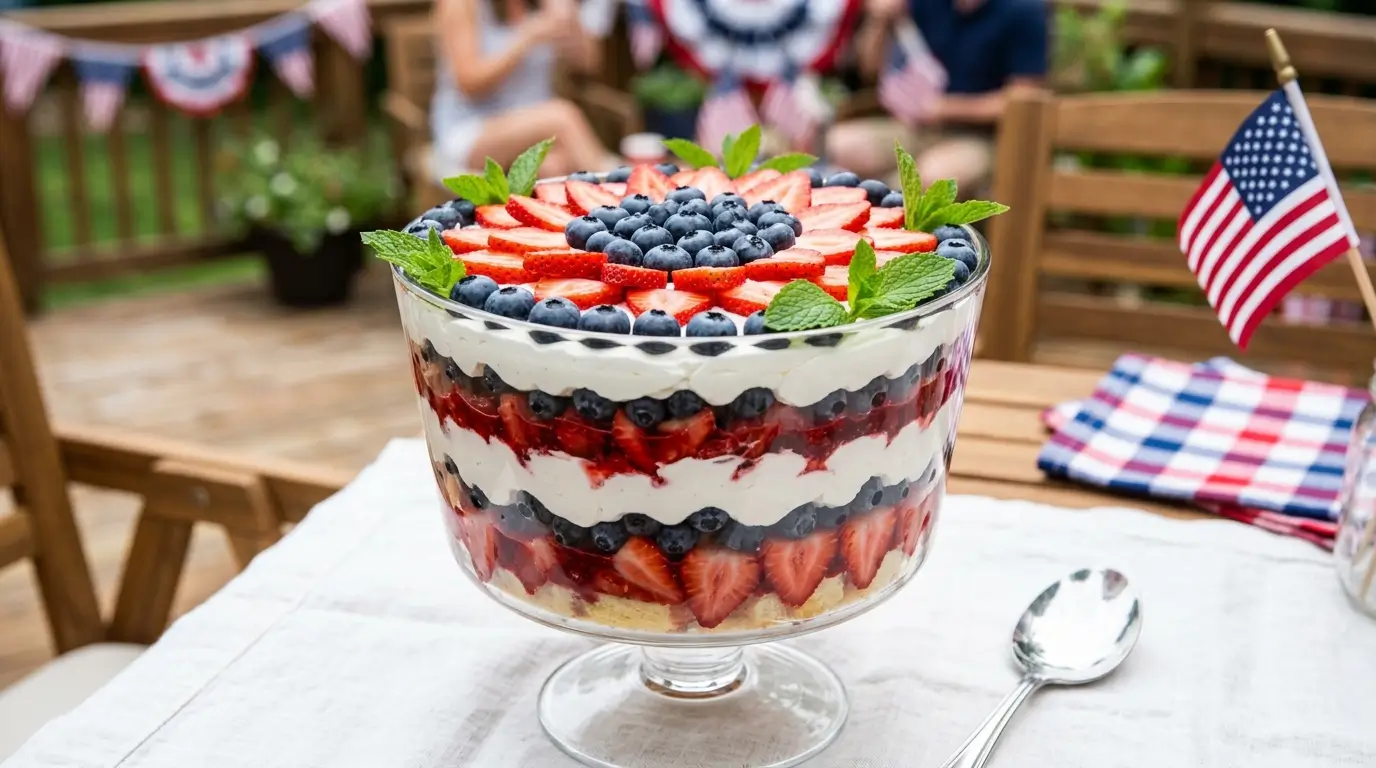
4th of July Trifle: Red White and Blue No Bake Dessert
What if the most eye-catching dessert on your Independence Day table required absolutely no time in the oven and came together in under thirty minutes? The 4th of July trifle has become one of the most searched patriotic recipes in America each summer — and its popularity is no coincidence. This stunning no bake dessert layers pillowy whipped cream, juicy strawberries, and plump blueberries into a bold red, white, and blue display that looks almost too beautiful to eat. Almost. Whether you are hosting a backyard cookout, heading to a potluck, or feeding a hungry crowd after fireworks, the 4th of July trifle delivers maximum festive impact with minimal effort, every single time.
Table of Contents
Ingredients
For this 4th of July trifle, you will need the following ingredients:
For the Layers:
- 1 large angel food cake (store-bought or homemade), cut into 1-inch cubes
- 2 lbs fresh strawberries, hulled and sliced
- 2 cups fresh blueberries
- 2 tablespoons granulated sugar, divided (1 for each berry)
- 1 tablespoon fresh lemon juice
For the Cream Layer:
- 2 cups heavy whipping cream
- 4 oz cream cheese, softened
- 3 tablespoons powdered sugar
- 1 teaspoon pure vanilla extract
For the Garnish:
- Whole strawberries and blueberries
- Fresh mint leaves
- Optional: star-shaped sprinkles or edible red and blue glitter
Timing
This 4th of July trifle requires the following time investment:
- Preparation time: 25 minutes
- Chilling time: 2 hours minimum (overnight recommended)
- Assembly time: 15 minutes
- Total time: approximately 2 hours 40 minutes (hands-on time under 40 minutes)
Step-by-Step Instructions
Step 1: Macerate the Berries for Maximum Flavor
Slice the strawberries and place them in a bowl with 1 tablespoon of granulated sugar and the lemon juice. Toss gently and set aside for 15 minutes. In a separate bowl, toss the blueberries with the remaining tablespoon of sugar. This maceration step is the secret weapon in this 4th of July trifle — it draws out the natural juices of the fruit, creating a lightly syrupy coating that soaks beautifully into the cake layers and intensifies the flavor throughout every bite. Do not skip it.
Step 2: Make the Cream Cheese Whipped Cream
In a large mixing bowl, beat the softened cream cheese on medium speed until completely smooth with no lumps. Add the powdered sugar and vanilla extract and beat again until combined. With the mixer running on medium-high, slowly pour in the cold heavy whipping cream and continue beating until the mixture thickens into soft, billowy peaks. This stabilized whipped cream holds its shape far better than plain whipped cream, which means your 4th of July trifle will stay picture-perfect even after several hours in the refrigerator.
Step 3: Cube the Angel Food Cake
Cut the angel food cake into roughly 1-inch cubes. Angel food cake is the ideal base for this 4th of July trifle — it is light, airy, and absorbent without turning soggy or heavy. It also keeps the overall dessert feeling fresh and summery rather than dense and rich, which is exactly the right tone for a warm Independence Day celebration. If you prefer a slightly denser base, pound cake works equally well and adds a buttery richness to each layer.
Step 4: Assemble the Trifle in Patriotic Layers
Now comes the most satisfying part of the 4th of July trifle. In a large clear glass trifle bowl, start with an even base layer of angel food cake cubes. Spoon a generous layer of the cream cheese whipped cream over the cake, spreading it all the way to the edges so the white layer is visible through the glass. Add a layer of sliced strawberries across the cream, then follow with a layer of blueberries. Repeat the sequence — cake, cream, strawberries, blueberries — until you reach the top of the bowl. The key is keeping each layer distinct and pressing the fruit gently against the glass as you go for the most dramatic red, white, and blue visual effect.
Step 5: Garnish and Refrigerate
Finish the top of your 4th of July trifle with a generous cloud of whipped cream and a decorative arrangement of whole strawberries and blueberries — try creating a small American flag pattern or a simple alternating ring of red and blue berries for a festive finishing touch. Tuck a few fresh mint leaves in for a pop of green and a hint of freshness. Cover loosely with plastic wrap and refrigerate for at least 2 hours before serving. Overnight chilling is even better, as the cake layers absorb the berry juices and cream for a more cohesive, deeply flavored no bake dessert.
Nutritional Information
For a serving of this 4th of July trifle (1 cup, based on 12 servings):
- Calories: 285 kcal
- Total Fat: 15g
- Saturated Fat: 9g
- Cholesterol: 55mg
- Sodium: 210mg
- Total Carbohydrates: 34g
- Dietary Fiber: 2g
- Total Sugars: 22g
- Protein: 4g
- Vitamin C: 38mg
- Calcium: 75mg
Healthier Alternatives
Transform your 4th of July trifle into a healthier version with these modifications:
- Coconut Whipped Cream: Replace the heavy whipping cream with chilled full-fat coconut cream whipped to soft peaks. It is dairy-free, subtly sweet, and holds its shape surprisingly well in the layered trifle.
- Greek Yogurt Base: Swap the cream cheese component for an equal amount of full-fat Greek yogurt. It adds a pleasant tang and a significant protein boost while keeping the cream layer thick and luscious.
- Reduce the Sugar: Cut the granulated sugar in half or omit it entirely if your berries are already ripe and sweet. Naturally sweet summer fruit rarely needs much help.
- Gluten-Free Cake: Use a store-bought gluten-free angel food cake or a simple almond flour sponge to make the entire 4th of July trifle suitable for gluten-sensitive guests without changing the overall look or flavor.
- Add Chia Seeds: Stir a tablespoon of chia seeds into the macerating berry mixture for a subtle fiber and omega-3 boost that disappears into the layers completely undetected.
Serving Suggestions
Elevate your 4th of July trifle experience with these ideas:
- Serve in individual mason jars or clear plastic cups for a portable, no-mess option that every guest can grab from the dessert table — perfect for outdoor cookouts where space is limited.
- Set the trifle bowl on a bed of crushed ice inside a larger bowl to keep it perfectly chilled throughout a long outdoor celebration without the need to constantly run back to the refrigerator.
- Pair a serving with a drizzle of fresh strawberry coulis made by blending a handful of macerated berries — it adds a jewel-toned finish and an extra burst of fruity flavor.
- For an adults-only variation, brush the angel food cake cubes lightly with a tablespoon of Grand Marnier or limoncello before layering for a subtle, sophisticated twist on this no bake dessert.
- Serve alongside other light summer desserts like lemon bars or fresh fruit skewers so guests can mix and match without feeling overwhelmed by richness.
Common Mistakes to Avoid
Master this 4th of July trifle by avoiding these pitfalls:
- Using Frozen Berries: Frozen berries release too much liquid as they thaw and will waterlog the cake layers, turning your trifle soggy within an hour. Always use fresh, ripe strawberries and blueberries for the best texture and color.
- Skipping the Maceration Step: Unmacerated berries lack the syrupy intensity that makes each layer of this 4th of July trifle so flavorful. Even 15 minutes of maceration makes a noticeable difference in taste.
- Assembling Too Far in Advance Without Chilling: Assembling and then leaving the trifle at room temperature causes the cake to over-saturate and the cream to lose structure. Always refrigerate immediately after assembly.
- Choosing an Opaque Bowl: A trifle only works visually in a clear vessel. An opaque bowl hides the layers entirely, which defeats the central appeal of this no bake dessert. Always use glass or clear acrylic.
- Making Layers Too Thin: Thin, skimpy layers look underwhelming through the glass and create an uneven flavor ratio in each spoonful. Be generous — each layer should be substantial enough to be distinct and satisfying on its own.
Storing Tips
Preserve the freshness of your 4th of July trifle with these strategies:
- Refrigerator Storage: Cover the assembled trifle tightly with plastic wrap and refrigerate for up to 2 days. Beyond that, the cake layers become overly saturated and the berries begin to lose their color and texture.
- Individual Portion Storage: Leftover individual servings store better than the large bowl — transfer them to airtight containers and refrigerate for up to 2 days. The smaller portions maintain better texture and layer integrity.
- Berry Prep Ahead: Wash, hull, and slice the strawberries up to 2 days in advance and store them dry in the refrigerator. Macerate only when you are ready to assemble to prevent them from releasing too much liquid prematurely.
- Avoid Freezing: This 4th of July trifle does not freeze well. The cream layer separates, the berries become mushy upon thawing, and the cake loses its pleasant texture entirely. Always make it fresh and serve within 2 days.
Conclusion
The 4th of July trifle is a no bake dessert that captures everything great about summer celebrations — fresh berries, light cream, and festive layers of red, white, and blue that look stunning with almost no effort. It is make-ahead friendly, crowd-sized, and endlessly customizable. Give it a try at your next Independence Day gathering and share your experience in the review section below!
FAQs
- Can I make this 4th of July trifle the night before? Yes, and it is actually encouraged. Assembling it the evening before your celebration gives the layers time to meld together beautifully. Just wait to add the final garnish of whole berries and mint until right before serving so they look fresh and vibrant.
- What can I use instead of angel food cake in this 4th of July trifle? Pound cake, ladyfingers, or a simple vanilla sponge cake all work wonderfully. Pound cake adds a richer, buttery flavor, while ladyfingers create a more delicate, tiramisu-like texture as they absorb the cream and berry juices.
- How do I keep the layers from mixing together? The key is working slowly and deliberately. Spoon each layer gently rather than pouring it, and use a spatula or the back of a large spoon to spread it to the edges without disturbing the layer below. Chilling the cream until it is firm before layering also helps keep everything in place.
- My whipped cream deflated after a few hours — what went wrong? Unstabilized whipped cream always deflates over time. Make sure you are using the cream cheese in the recipe — it is what keeps the cream layer thick and stable for hours without weeping or collapsing, which is essential for any make-ahead no bake dessert.
Your Feedback Matters
There are no reviews yet. Be the first one to write one.