Breakfast Granola Cups: Easy & Crunchy Recipe
Is it possible that the way you have been eating granola all these years has been making your mornings less exciting than they could be? Breakfast granola cups flip the entire concept on its head — instead of pouring granola over yogurt in a bowl, the granola becomes the bowl itself. These breakfast granola cups are a refreshing cold breakfast that combines a satisfying crunch with creamy, fruit-forward fillings in a form that is as practical as it is beautiful. Whether you are prepping for a busy weekday or treating yourself to a leisurely morning, breakfast granola cups deliver flavor, nutrition, and visual appeal in one neat little shell.
Table of Contents
Ingredients
For these breakfast granola cups, you will need the following:
- 2 and 1/2 cups rolled oats
- 1/3 cup honey or pure maple syrup
- 3 tablespoons coconut oil, melted
- 1/2 teaspoon vanilla extract
- 1/4 teaspoon cinnamon
- 1/4 teaspoon salt
- 1/3 cup chopped almonds or walnuts
- 1 and 1/2 cups plain Greek yogurt (for filling)
- 1 cup mixed fresh berries — blueberries, raspberries, sliced strawberries
- 2 tablespoons honey, for drizzling
Timing
These breakfast granola cups require the following time investment:
- Preparation time: 10 minutes
- Baking time: 18 to 22 minutes
- Cooling time: 20 minutes
- Assembly time: 5 minutes
- Total time: approximately 55 minutes
Step-by-Step Instructions
Step 1: Preheat and Prepare Your Muffin Tin
Preheat your oven to 325°F (165°C). Generously grease a standard 12-cup muffin tin with coconut oil or cooking spray, making sure to coat the sides as well as the base. This step is non-negotiable — a well-greased tin is the difference between breakfast granola cups that pop out cleanly and ones that crumble on removal. For extra insurance, you can also line each cup with a small square of parchment paper, pressing it into the corners. Set the prepared tin aside while you work on the granola mixture.
Step 2: Mix the Granola Base
In a large mixing bowl, combine the rolled oats, chopped nuts, cinnamon, and salt, stirring until evenly distributed. In a small saucepan over low heat, warm the honey and coconut oil together for about 1 to 2 minutes until fully combined and pourable. Remove from heat and stir in the vanilla extract. Pour the warm liquid mixture over the dry oat mixture and stir thoroughly until every oat is coated and glistening. The mixture should feel sticky and hold its shape when pressed between your fingers — this cohesion is what makes your breakfast granola cups keep their form during baking.
Step 3: Press and Shape the Cups
Spoon roughly 3 tablespoons of the granola mixture into each muffin cup. Using the back of a spoon or your fingertips, firmly press the mixture up the sides and into the base of each cup, forming a well in the center. Apply consistent, even pressure to compact the granola — loose granola will fall apart once baked. Aim for a wall thickness of about 1/4 inch throughout. This is the most important structural step for breakfast granola cups, so take an extra 30 seconds per cup to really press and shape carefully.
Step 4: Bake Until Golden
Slide the muffin tin into the preheated oven and bake for 18 to 22 minutes, until the edges and base of each cup are a deep golden brown. Watch carefully after the 18-minute mark — the honey content means these breakfast granola cups can go from perfect to over-toasted quickly. The cups will still feel slightly soft when they come out of the oven, which is completely normal. Resist the urge to remove them immediately. Allow the tin to cool on a wire rack for at least 20 minutes at room temperature before attempting to release the cups.
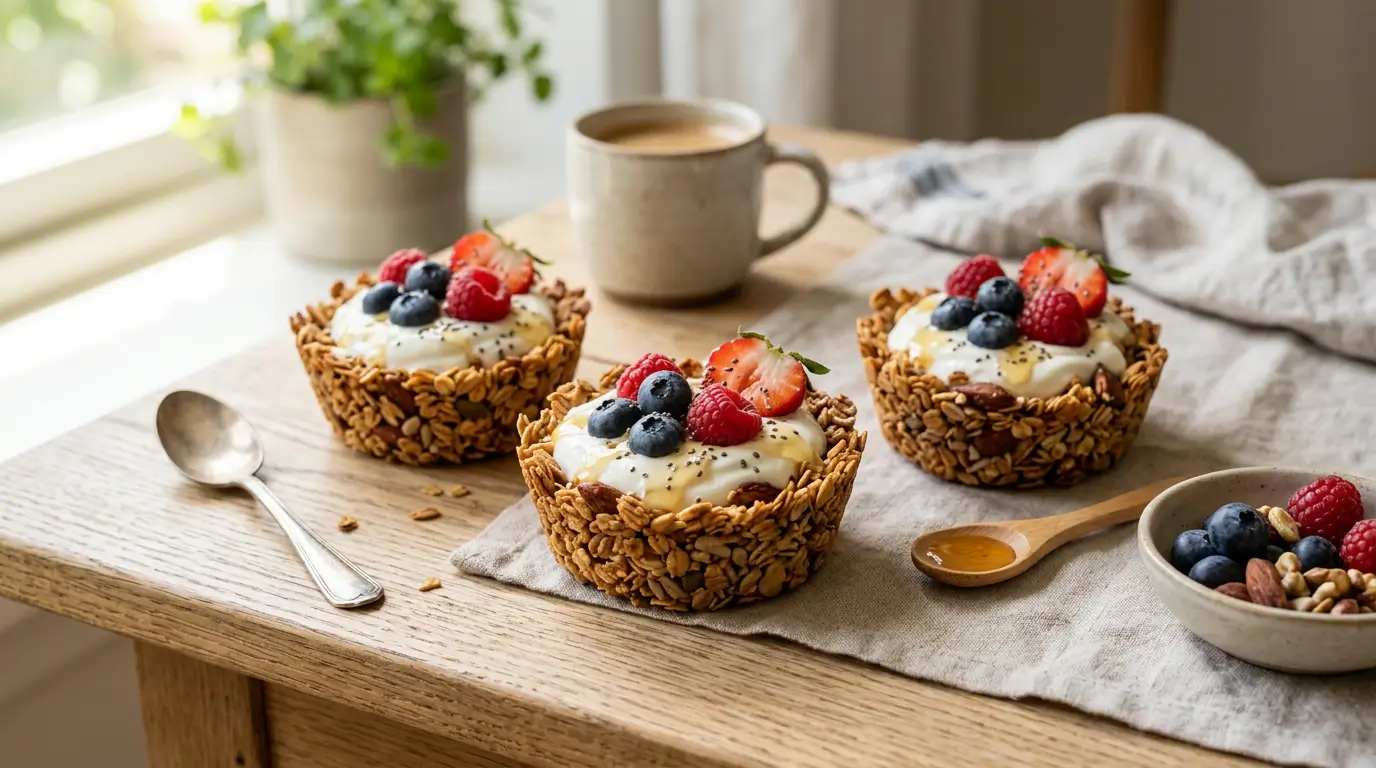
Step 5: Release, Fill, and Serve
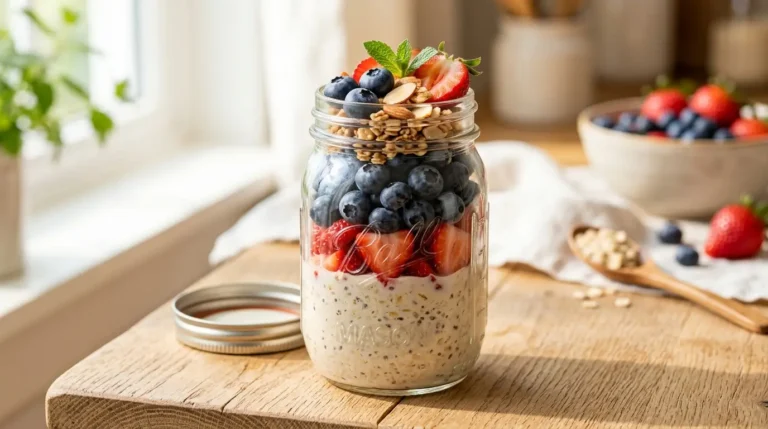
Once fully cooled, gently run a thin knife or offset spatula around the edge of each cup to loosen it, then carefully lift them out. The cups should feel firm and hold their shape with a satisfying crunch. Arrange them on a serving plate or meal-prep tray. Spoon a generous dollop of Greek yogurt into each breakfast granola cup, then top with fresh berries and a light drizzle of honey. Serve immediately for maximum crunch, or refrigerate the unfilled cups and assemble just before eating.
Nutritional Information
For a serving of these breakfast granola cups (2 cups with yogurt and berries, based on 6 servings):
- Calories: 290 kcal
- Total Fat: 11g
- Saturated Fat: 5g
- Cholesterol: 5mg
- Sodium: 105mg
- Total Carbohydrates: 40g
- Dietary Fiber: 4g
- Total Sugars: 18g
- Protein: 9g
- Calcium: 120mg
- Iron: 2mg
- Potassium: 210mg
Healthier Alternatives
Transform your breakfast granola cups into an even healthier version with these modifications:
- Reduce the Sweetener: Cut the honey down to 3 tablespoons and add 1 tablespoon of unsweetened applesauce to maintain moisture and binding without spiking sugar content.
- Use Nut-Free Granola: Replace chopped almonds or walnuts with pumpkin seeds or sunflower seeds for an allergy-friendly version that is equally crunchy and nutritious.
- Swap the Oil: Replace coconut oil with light avocado oil for a more neutral flavor profile and a slightly higher smoke point that gives the cups an even more even toast.
- Dairy-Free Filling: Use unsweetened coconut yogurt or cashew-based yogurt instead of Greek yogurt for a fully plant-based version that is still rich and creamy.
- Add Protein: Mix one scoop of unflavored or vanilla protein powder into the granola base to boost the protein content of your breakfast granola cups without altering the texture significantly.
Serving Suggestions
Elevate your breakfast granola cups experience with these ideas:
- Layer the yogurt filling with a thin spread of almond butter at the base before adding the yogurt for a nutty, protein-rich depth of flavor underneath.
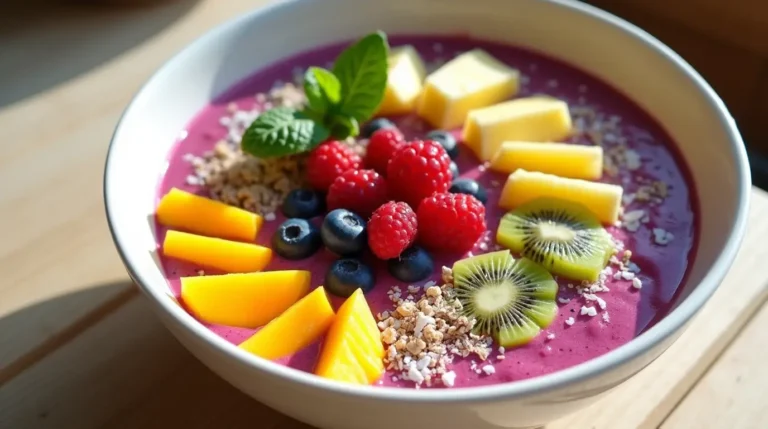
- Top with sliced kiwi, mango cubes, or passion fruit pulp instead of berries for a tropical cold breakfast variation that feels like a vacation in every bite.
- Drizzle with tahini and a pinch of flaky sea salt for a sophisticated sweet-and-savory contrast that will surprise and delight.
- Serve alongside a chilled matcha latte or a glass of cold-pressed orange juice to complete the morning spread with color and freshness.
- Sprinkle with a pinch of orange zest and a few fresh mint leaves just before serving for a burst of brightness that elevates both the flavor and the presentation.
Common Mistakes to Avoid
Master these breakfast granola cups by avoiding these pitfalls:
- Not Pressing the Granola Firmly Enough: A loosely packed cup will crumble the moment you try to remove it from the tin. Press firmly and consistently with your fingertips or the back of a measuring cup for a stable structure.
- Removing the Cups Too Soon: Granola cups need time to set and harden as they cool. Attempting to remove them while still warm will cause them to break apart. Always wait the full 20 minutes before handling.
- Using Quick Oats Instead of Rolled Oats: Quick oats are processed finer and absorb liquid faster, resulting in a dense, crumbly cup rather than a chewy-yet-crunchy shell. Always use old-fashioned rolled oats for the best texture in breakfast granola cups.
- Skipping the Cooling Step Before Filling: Filling warm granola cups with cold yogurt creates a steam effect that makes the shell soggy within minutes. Always fill only completely cooled cups.
- Uneven Wall Thickness: Thin spots in the granola walls bake faster and can burn before the rest of the cup is done. Aim for consistent 1/4-inch thickness throughout every cup.
Storing Tips
Preserve the freshness of your breakfast granola cups with these strategies:
- Room Temperature Storage: Store unfilled, fully cooled granola cups in an airtight container at room temperature for up to 4 days. They stay crispy and ready to fill whenever the morning calls.
- Refrigerating Filled Cups: Once filled with yogurt, breakfast granola cups are best consumed within 2 hours to preserve maximum crunch. If refrigerating overnight, expect the shell to soften slightly.
- Freezing the Shells: Freeze unfilled cups in a single layer on a baking sheet for 1 hour, then transfer to a freezer-safe bag or container. They keep well for up to 2 months and thaw at room temperature in about 15 minutes.
- Prepping the Granola Mixture Ahead: Mix and store the unbaked granola mixture in a sealed container in the refrigerator for up to 3 days. Press and bake fresh cups as needed throughout the week.
- Keeping Toppings Separate: Store berries and yogurt separately in the refrigerator and assemble only at serving time to keep every element of your breakfast granola cups at peak texture and flavor.
Conclusion
Breakfast granola cups are a delightful cold breakfast that combines a crispy toasted oat shell with creamy yogurt and vibrant fresh fruit for a morning meal that is nourishing, portable, and genuinely exciting. With the right technique and quality ingredients, these cups come together beautifully every time. Try the recipe and share your thoughts in the review section below!
FAQs
Can I make breakfast granola cups without a muffin tin? Yes! You can use a silicone muffin mold, small oven-safe ramekins, or even shape the granola into free-form nests on a lined baking sheet. The muffin tin simply gives the most consistent cup shape and size.
Why did my breakfast granola cups fall apart? The most common cause is insufficient pressing before baking, or removing the cups from the tin before they have fully cooled and hardened. Make sure your granola mixture is sticky enough, press firmly, and always cool completely before removing.
Can I add chocolate to the granola base? Absolutely. Stir in 2 tablespoons of cocoa powder into the dry mix, or add mini dark chocolate chips after the cups have cooled completely for a chocolatey twist that pairs beautifully with berry or banana toppings.
Can I make these breakfast granola cups gluten-free? Yes. Simply use certified gluten-free rolled oats, which are widely available and work identically in this recipe. All other ingredients in this recipe are naturally gluten-free as well.
Your Feedback Matters
There are no reviews yet. Be the first one to write one.