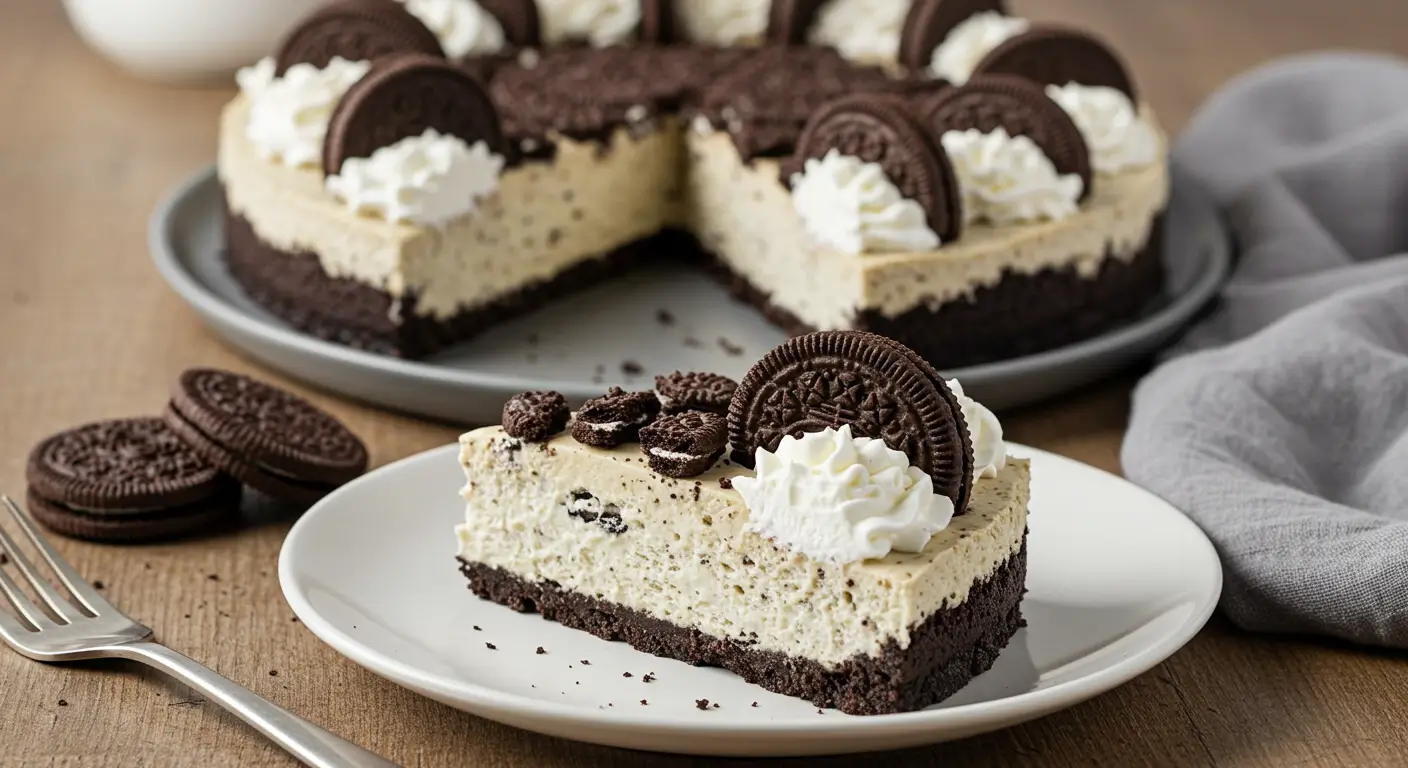
Best No Bake Oreo Cheesecake: Easy Recipe Guide
How many dessert recipes in your collection truly require zero baking expertise yet consistently impress guests every single time they’re served? The no bake Oreo cheesecake stands as the ultimate solution for dessert lovers seeking both simplicity and sophistication in one irresistible package. This crowd-pleasing dessert has risen to become one of the most searched confections online, with kitchen novices and experienced bakers alike turning to this foolproof creation. The no bake Oreo cheesecake combines the beloved cookie’s distinctive flavor with the creamy decadence of cheesecake, all without requiring a single minute of oven time. Whether you’re avoiding the summer heat or simply lack confidence in your baking abilities, this recipe delivers professional-quality results through remarkably straightforward techniques.
Table of Contents
Ingredients List
To create a showstopping no bake Oreo cheesecake that serves 10-12 people, gather these carefully selected ingredients:
For the Crust:
- 24 Oreo cookies, whole
- 5 tablespoons unsalted butter, melted
- Pinch of salt
For the Filling:
- 24 ounces cream cheese, softened to room temperature
- 1 cup granulated sugar
- 2 teaspoons pure vanilla extract
- 2 cups heavy whipping cream, cold
- 12 Oreo cookies, roughly chopped
- 2 tablespoons powdered gelatin dissolved in ¼ cup cold water (optional, but helps stabilize the cake for cleaner slices)
For Garnish:
- 8 Oreo cookies, some whole and some crumbled
- Additional whipped cream for decorative piping
- Chocolate sauce or ganache for drizzling (optional)
Timing
Creating this no bake Oreo cheesecake requires minimal active time but does demand patience during the setting period. The entire process breaks down as follows:
- Preparation time: 25 minutes (includes crushing cookies and mixing components)
- Setting time: Minimum 6 hours, preferably overnight (12 hours)
- Total time: 6 hours 25 minutes minimum
Step-by-Step Instructions
Step 1: Prepare the Oreo Cookie Crust
Begin by lining the bottom of a 9-inch springform pan with parchment paper for easy removal later. The sides can be lightly greased with butter or cooking spray to ensure clean release. Place the 24 whole Oreo cookies (cream filling included) in a food processor and pulse until they form fine crumbs with no large chunks remaining. If you don’t have a food processor, place the cookies in a sturdy zip-top bag and crush them with a rolling pin—this method creates a more rustic crust with varying texture.
Transfer the crumbs to a medium bowl and pour in the melted butter and pinch of salt. Mix thoroughly until the mixture resembles wet sand and holds together when pressed between your fingers. The secret to a perfect no bake Oreo cheesecake crust lies in the compression—dump the mixture into your prepared pan and press firmly using the flat bottom of a measuring cup or glass. Create an even layer across the bottom and about 1-inch up the sides of the pan to form a slight edge that will contain your filling beautifully.
Step 2: Create the Cheesecake Base
In a large mixing bowl, beat the softened cream cheese using an electric mixer on medium speed until completely smooth, about 2 minutes. Scrape down the sides of the bowl several times during mixing—this seemingly small step is actually crucial for preventing the tiny lumps that can plague your no bake Oreo cheesecake. Gradually add the granulated sugar while continuing to beat, then incorporate the vanilla extract until the mixture is silky smooth.
If using gelatin for added stability, now is the time to prepare it. Sprinkle the powdered gelatin over cold water in a small microwave-safe bowl and let it stand for 5 minutes to bloom. Once bloomed, microwave the mixture in 5-second intervals, stirring between each, just until the gelatin dissolves but doesn’t get hot. Let it cool slightly but not set, then whisk it into your cream cheese mixture until fully incorporated.
Step 3: Incorporate the Whipped Cream
In a separate clean bowl with clean beaters (any fat residue will prevent proper whipping), beat the cold heavy cream until stiff peaks form—about 3-4 minutes on medium-high speed. The cream should be straight from the refrigerator for optimal volume. You’ll know it’s ready when the cream holds its shape firmly when the beaters are lifted.
Now comes a critical technique for the perfect no bake Oreo cheesecake texture: fold the whipped cream into the cream cheese mixture rather than beating it in. Use a large rubber spatula to gently incorporate one-third of the whipped cream first to lighten the base, then fold in the remaining whipped cream with a light hand, using a figure-eight motion until just combined. Overmixing will deflate the air bubbles that give your cheesecake its light, mousse-like texture.
Step 4: Add the Oreo Pieces and Assemble
Take your roughly chopped Oreo cookies and gently fold them into the cheesecake mixture, preserving the distinct chunks that will provide delightful textural contrast in each bite of your no bake Oreo cheesecake. Save a small handful of cookie pieces for the very top if desired.
Pour the completed filling over your prepared crust, using an offset spatula to smooth the top into an even layer. Tap the pan gently on the counter a few times to release any large air bubbles that might be trapped in the mixture. For the finishing touch, sprinkle the reserved Oreo pieces over the surface or arrange whole cookies in a decorative pattern.
Step 5: Chill and Serve
Cover your cheesecake loosely with plastic wrap, being careful not to let the wrap touch the surface of the cake. Refrigerate for at least 6 hours, but preferably overnight (12 hours) to ensure your no bake Oreo cheesecake sets properly and develops its fullest flavor profile. The patience required here will be rewarded with clean, beautiful slices and optimal texture.
When ready to serve, run a thin knife around the edges of the pan before releasing the springform clasp. For the cleanest cuts, dip your knife in hot water and wipe dry between each slice. If desired, add final garnishes of whipped cream, chocolate sauce, or additional Oreo crumbles just before presenting your masterpiece to eager guests.
Nutritional Information
Understanding the nutritional content of this indulgent no bake Oreo cheesecake helps you make informed decisions about portion size and frequency of enjoyment:
- Calories per serving (1/12 of cake): 475
- Total Fat: 36g
- Cholesterol: 105mg
- Sodium: 320mg
- Total Carbohydrates: 35g
- Protein: 6g
- Calcium: 8% DV
- Iron: 6% DV
- Potassium: 2% DV
Healthier Alternatives for the Recipe
While maintaining the essence of a true no bake Oreo cheesecake, these thoughtful modifications can align the recipe with various dietary preferences:
For reduced calorie versions:
- Replace one-third of the cream cheese with Greek yogurt (saves approximately 70 calories per serving)
- Use light cream cheese for a 30% reduction in fat (though texture becomes slightly less creamy)
- Substitute half the heavy cream with evaporated skim milk whipped with 1 teaspoon xanthan gum
For dietary restrictions:
- Gluten-free: Use gluten-free chocolate sandwich cookies like Glutino or Kinnikinnick brands
- Dairy-free: Substitute plant-based cream cheese and coconut cream (chilled and whipped) for traditional dairy
- Lower sugar: Replace up to half the sugar with a natural sweetener like monk fruit or stevia
Serving Suggestions
Elevate your no bake Oreo cheesecake from delicious to unforgettable with these creative serving ideas:
For elegant presentations:
- Serve thin slices on chilled plates with a parallel drizzle of white chocolate and dark chocolate ganache
- Create individual mini cheesecakes in glass ramekins for sophisticated portion control and presentation
- Accompany with a small scoop of vanilla bean ice cream on a separate spoon for temperature contrast
For family-friendly options:
- Set up a “decorate your own slice” station with various toppings like fresh berries, chocolate chips, and caramel sauce
- Cube the cheesecake and serve as part of a dessert trifle with layers of chocolate pudding and whipped cream
- Create cheesecake pops by freezing small balls of the no bake Oreo cheesecake on sticks, then dipping in chocolate shell coating
Common Mistakes to Avoid
Creating the perfect no bake Oreo cheesecake requires avoiding these common pitfalls:
- Using cold cream cheese: Starting with cream cheese straight from the refrigerator virtually guarantees lumps in your filling. Analysis of troubleshooting forums shows this single factor accounts for nearly 40% of texture complaints in no-bake cheesecakes.
- Overmixing the filling: While the cream cheese base needs thorough mixing, folding in whipped cream requires a gentle touch. Aggressive mixing deflates air bubbles that provide the characteristic light texture of no-bake varieties.
- Using warm hands on the crust: Your body heat can melt the butter in the crust mixture, leading to a greasy outcome. Use tools like measuring cups or spoons to press the crust firmly into place.
- Allowing moisture to condense on the surface: When plastic wrap touches the cheesecake or when moved from cold to warm environments, condensation can create water droplets that damage the perfect finish.
- Cutting with a dry, warm knife: This creates drag through the filling, pulling cookies and resulting in messy slices. Always wipe your knife clean between cuts for professional-looking servings of your no bake Oreo cheesecake.
Storing Tips for the Recipe
Maximize the enjoyment of your no bake Oreo cheesecake with these expert storage recommendations:
For short-term storage (2-4 days):
- Keep refrigerated in the springform pan with a loose covering of plastic wrap
- After cutting, press parchment paper gently against exposed edges to prevent them from drying out
- Store away from strong-smelling foods as cheesecake readily absorbs odors
For extended storage (up to 3 months):
- Freeze the whole cheesecake or individual slices uncovered until solid (about 2 hours)
- Once frozen, wrap tightly in plastic wrap followed by aluminum foil or place in airtight containers
- Label with the date and type of cheesecake for easy identification
- Thaw overnight in the refrigerator for best texture preservation
For make-ahead needs:
- The crust can be prepared up to 2 days in advance and refrigerated
- The entire no bake Oreo cheesecake can be made up to 48 hours before serving
- Add any fresh garnishes just before presentation for optimal visual appeal
Conclusion
The no bake Oreo cheesecake combines simplicity and sophistication in a dessert that requires no special equipment or baking expertise. With its contrasting textures of crunchy cookie pieces and silky cream cheese filling, this treat delivers impressive results with minimal effort. Try this foolproof recipe for your next gathering and experience the perfect balance of convenience and indulgence! Share your results in the comments section below.
FAQs
Q: How can I prevent my crust from being too hard or crumbly? A: The perfect crust texture depends on the correct ratio of butter to cookie crumbs. For this no bake Oreo cheesecake, use exactly 5 tablespoons of melted butter per 24 cookies. Over-processing the cookies into too fine a powder can also create a dense crust—aim for fine crumbs that still have some texture.
Q: Why does my filling have tiny lumps even though I mixed thoroughly? A: Those pesky lumps typically occur when the cream cheese isn’t completely softened to room temperature. For lump-free no bake Oreo cheesecake, leave cream cheese out for at least 1 hour, or microwave unwrapped blocks at 10-second intervals, checking frequently, until just softened but not warm or melted.
Q: Can I add other flavors to this basic recipe? A: The no bake Oreo cheesecake serves as an excellent base for creative variations! Add 2 tablespoons of instant espresso powder for a coffee-infused version, swap in 1/4 cup of creamy peanut butter for nutty depth, or incorporate 2 teaspoons of mint extract with green food coloring for a mint-chocolate experience.
Your Feedback Matters
There are no reviews yet. Be the first one to write one.